Adding a Sphere
Adding a Sphere
现在我们为光线追踪器添加一个球体,作为场景中的第一个物体。之所以选择球体,是因为计算球体与光线的相交相对简单。
5.1 Ray-Sphere Intersection
假设三维空间中一个球体的中心位置位于点(Cx, Cy, Cz)上,半径为r,则该球体的表达公式为
\[(C_x-x)^2+(C_y-y)^2+(C_z-z)^2=r^2\]在计算机图形学,我们要尽可能地使用向量,例如我们可以使用vec3类来表示xyz坐标。在球体的等式中,从点P到球心C的向量可以表示为C-P,我们可以利用点积的性质,将公式转换为:
其中等式右边等于半径的平方, 同时我们将P的half-line等式代入,最终整理可得:
\[t^2d\cdot d-2td\cdot(C-Q)+(C-Q)\cdot (C-Q)-r^2=0;\]在该等式中,只有t是未知数,我们可以一元二次方程的求根公式来解不等式:
\[\frac{-b \pm \sqrt{b^2 - 4ac}}{2a}\]其中:
\[\displaylines{a = \mathbf{d} \cdot \mathbf{d} \\ b = -2 \mathbf{d} \cdot (\mathbf{C} - \mathbf{Q}) \\ c = (\mathbf{C} - \mathbf{Q}) \cdot (\mathbf{C} - \mathbf{Q}) - r^2\\}\]在光线-球体的相交问题上,根的个数与交点的个数相等:

5.2 Creating Our First Raytraced Image
我们可以在场景中放置一个球体在z轴-1的位置上,并且将相交返回的颜色统一设置为红色:
1
2
3
4
5
6
7
8
9
10
11
12
13
14
15
16
17
18
19
20
21
22
23
bool hitSphere(const point3& center, double radius, const ray& r)
{
	vec3 oc = center - r.origin();
	double a = dot(r.direction(), r.direction());
	double b = dot(-2 * r.direction(), oc);
	double c = dot(oc, oc) - radius * radius;
	double discriminant = b * b - 4 * a * c;
	return discriminant >= 0;
}

color rayColor(const ray& r)
{
	// Objects in the scene
	if (hitSphere(point3(0, 0, -1), 0.5, r))
	{
		return color{1, 0, 0};
	}

	// Background
	vec3 unitDirection = unitVectorLength(r.direction());
	double t = (unitDirection.y() + 1.0) * 0.5;
	return color(1.0, 1.0, 1.0) * (1.0 - t) + color(0.5, 0.7, 1.0) * t;
}
最终得到的结果如下图所示:
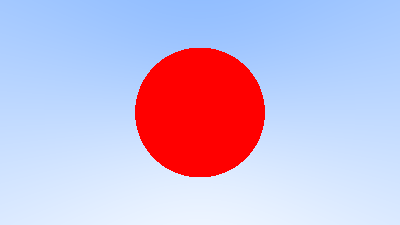
当前的渲染还少了很多内容,如阴影、反射等。
本文由作者按照 CC BY 4.0 进行授权